Radio Controlled Models
Share RCScrapyard on Facebook
RCScrapyard Radio Controlled Models
Flags
RCScrapyard.net contains Google and Amazon Affiliate links, which may earn us commission. See our Disclosure page for more info.
bar

Tamiya M26 Pershing - Full Option Kit Complete - 56015 (Radio Controlled Model Review)

1/16 Scale Electric Tank -


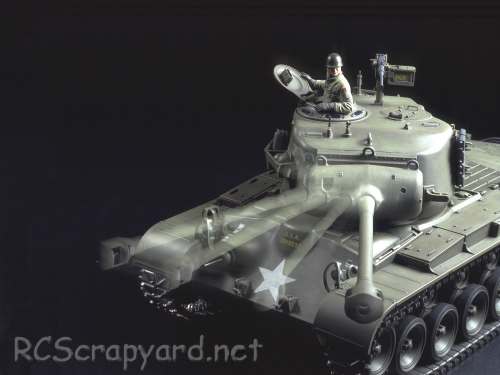
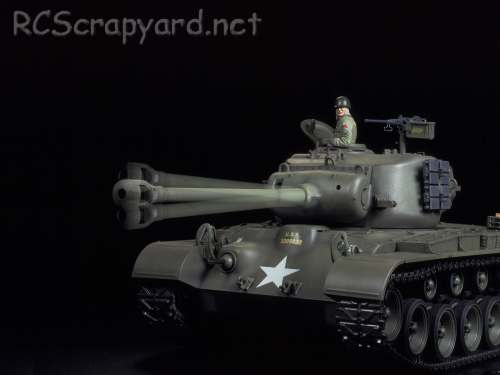
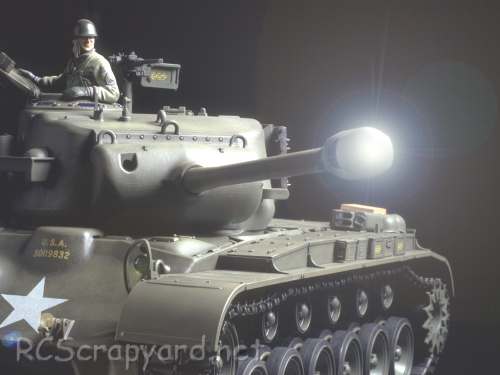
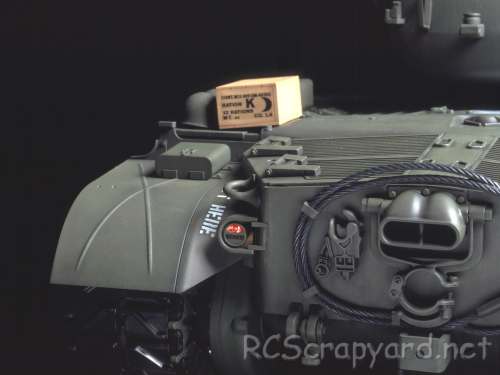
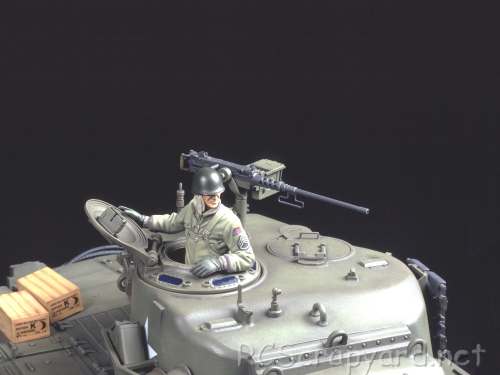
  Released by Tamiya on June 26, 2002, the M26 Pershing - US Medium Tank T26E3 (#56015) is the Complete Full Option Kit version, with a battery, charger and 4-channel radio system included.

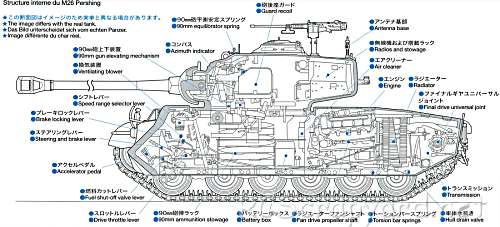
  A front-mounted double gearbox, with two electric motors, operate together or individually to produce forward/reverse running and pivot turning. Metal torsion bars and suspension arms combine with the wide tracks to smoothly absorb bumps and dips in the terrain and provide high manoeuvrability. In addition, realistic engine sounds accompany the tank as it starts up, drives and stops to idle. The main gun can be elevated, depressed and swung to the left and right.

Tamiya M26 Pershing - # 56016

▼ Scroll Down for More Images ▼


  The M26 Pershing was a heavy/medium tank of the US Army. Named after General John J. Pershing, famous for his exploits in World War I. It was briefly used in the final months of World War II during the Invasion of Germany and extensively during the Korean War.

  Intended as a replacement for the M4 Sherman, the prolonged time of development meant that only a small number saw combat in the Europe, most notably in the 9th Armored Division's dramatic dash to take the Ludendorff Bridge during the Battle of Remagen. In service during the Korean War, the M26 outmatched the T-34-85 in terms of firepower and protection, but was challenged by the hilly and muddy terrain and as a result was withdrawn in 1951. The lineage of the M26 continued with the M47 Patton and was reflected in the new designs of the later M48 Patton and M60 Patton.

  This model comes with metal bushings, that after a short while, when dust and grit get into them, can actually wear into the metal drive shafts that spin in them - we recommend these should be replaced by a full set of steel shielded ball bearings ASAP.


Rating: 44 Stars out of 5 RCScrapyard


Gas/Nitro Engines Body Shells Radio Transmitters etc Tires Wheels/Rims Electronic Speed Controllers Battery Packs / Chargers Electric Motors


Flags


Tamiya M26 Pershing
Tamiya M26 Pershing
Tamiya M26 Pershing
Tamiya M26 Pershing
Tamiya M26 Pershing
Tamiya M26 Pershing
Tamiya M26 Pershing
Tamiya M26 Pershing
Tamiya M26 Pershing
Tamiya M26 Pershing
Tamiya M26 Pershing
Tamiya M26 Pershing

Hints, Tips and Information

How to avoid Radio Interference

1/  The first consideration when installing your Receiver into your Electrically Powered Model is to make sure it is well away from the Negative Battery terminal, and the Motor. The Magnetic field can cause stuttering type interference at times of high current draw (i.e., Fast Acceleration)

2/  Make sure the Ariel tube is long enough for the Ariel wire. The tip of this wire is highly sensitive and should be as high, and as far away from the Motor as possible (yup, its that magnetic field prob again)

3/  If all else fails, a simple tip that often works for all RC Model enthusiasts is to wrap the receiver in Aluminium Foil, to shield against any magnetic and external radio interference.

Read the Complete Article  ▶ ▶


Tamiya Buggys Tamiya Trucks Tamiya Monster Trucks Tamiya Rock Crawlers Tamiya Off Road Chassis Types Tamiya Touring Car Tamiya Drift Car Tamiya WRC Car Tamiya M Chassis
Tamiya Tractor Trucks Tamiya Touring Car Chassis Tamiya F1 Tamiya F1/Le Mans Chassis Types Tamiya Military Tamiya Tanks


Hints, Tips and Information

How to put on Decals

   After spending lots of time and effort to paint your bodyshell, you come to the point where you make it look good by putting on all those flashy decals, but before you rush in with the scissors and start cutting, there are a few things you should do first.

   Good preparation is key to a perfect job, so before you do anything with your decals, you must first of all wash your hands, and then make sure the bodyshell is clean and no oil or grime from your previously grubby fingers remains on the Polycarbonate Lexan surface. Methylated spirits is the thing to use, or failing that, use one of those wipes you use for your computer monitor screen.

   As the body shell dries, you can carefully cut out the decals from the sheet. Do the big ones first and leave the smallest ones for last.

Read the Complete Article  ▶ ▶


Hints, Tips and Information

Radio Frequencies - be Careful be Safe

   After buying your first car, it won't be long before you need more than simply bashing around the back yard, or out on the street. So you will be looking around to find a club that is not too far away where you can do some serious racing.

   Before you can start racing, you will need at least three different sets of crystal frequencies. The race organisers will note down all your available frequencies when you register at the track and allocate one of those frequencies to you for your heat. To avoid change over problems from one heat to the next, they generally try to give you a frequency that no one in the heat before or after is using, but always check to make sure before you put your car down on the track and switch on.

   There is nothing more annoying than to be in the middle of your best qualifying race and some idiot switching on their transmitter in the pits, on your frequency. Not only could it spoil your race, but it could cost you a lot of money if at the time you are travelling at top speed along the straight, loose control and crash head on into the wall.

Read the Complete Article  ▶ ▶


^ TOP ^

RC Models:
Radio
& Motors:
Other
Accessories: